
Fishing enthusiasts know the frustration of storing fishing rods safely. A cluttered garage or shed can damage rods. Moreover, improper storage can lead to breakage. Fortunately, making a ceiling fishing rod holder is a practical and aesthetically pleasing solution. This DIY project will not only save space but also keep your rods organized. In this article, we’ll explore the materials, steps, and tips for creating an efficient ceiling fishing rod holder.
Materials Needed for DIY Ceiling Fishing Rod Holder
Essential Tools for Building
When beginning your DIY fishing rod holder, you’ll need various tools. First, gather a ladder for easy access to your ceiling. Also, find a tape measure to ensure precise measurements. A drill with appropriate bits is essential for making holes. You’ll also need wood screws for secure attachment.
Additionally, consider a saw for cutting wood to proper lengths. A level will ensure your holder aligns correctly. Having a stud finder is also helpful. It will locate the best places to drill into your ceiling. With these tools, you can move smoothly through the building process.
Materials to Collect
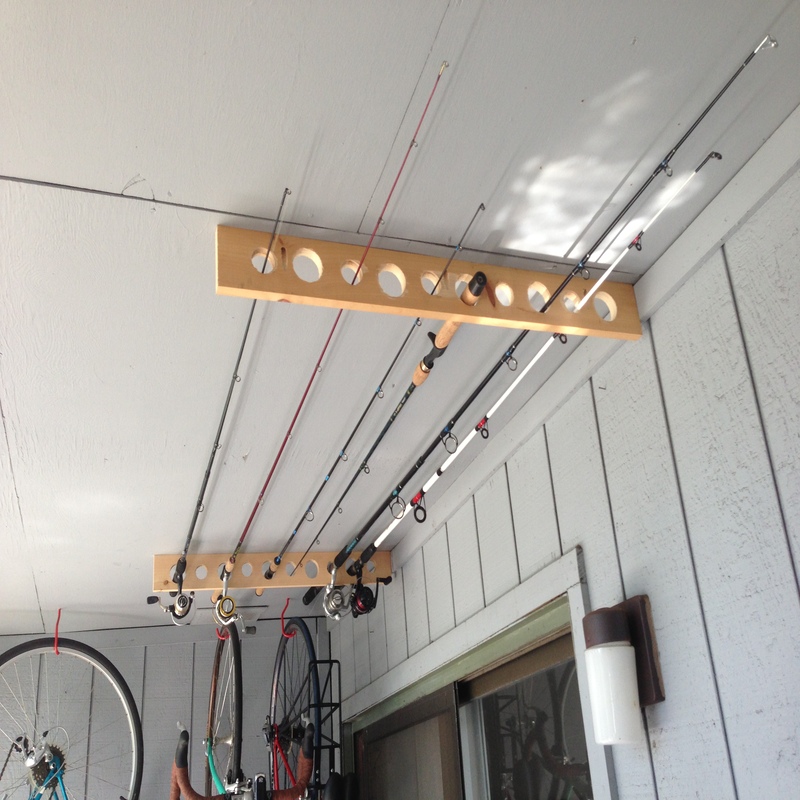
Next, you will need specific materials to construct the holder. Begin with a sturdy wood plank, such as pine or oak. The plank should be thick enough to support the weight of your fishing rods. It is recommendable to use a length of about four feet. This length provides ample space while fitting comfortably in most ceilings.
Additionally, vinyl tubing can be great for securing your rods. This tubing is flexible and durable enough to hold your gear. You’ll also need anchor screws for securing the wood into the ceiling. Some anglers opt for brackets for extra support. Finally, finish your holder with paint or wood stain to match your décor.
Step-by-Step Instructions to Build the Holder
Measuring and Planning
Before you start building, planning the dimensions is vital. First, determine how many rods you want to store. This number influences the length of the wood plank you select. Measure the average length of your fishing rods, taking into account any reels attached.
Next, choose the spot on your ceiling where you’ll install the holder. Consider accessibility and visibility when placing it. Use a chalk line to mark the position where the holder will go. This precaution ensures a precise location. Double-check the measurements to avoid mistakes.
Attaching the Wood to the Ceiling
Once you have your measurements, it’s time to attach the wood. Use a stud finder to locate the ceiling joists. These sturdy supports will anchor your holder firmly. Next, hold the wood plank against the ceiling where you’ve marked. Use a level to ensure that the plank is straight.
After confirming the alignment, drill pilot holes for the screws. This prevention will stop the wood from splitting when you screw it in. Secure the wood to the ceiling using anchor screws. Ensure each screw is tight and the wood is stable. A well-secured holder will prevent accidents and ensure durability.
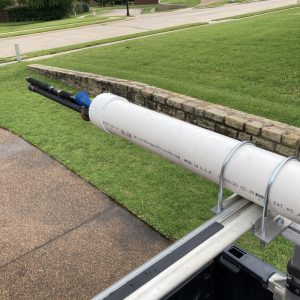
Adding the Vinyl Tubing
After securing the wood plank, it’s time to add the vinyl tubing. Measure the tubing based on the length of your rods. Cut the tubing into equal lengths as needed. Position the pieces along the length of the wood plank. Consider spacing them evenly for a neat appearance.
Next, use zip ties to secure the tubing to the wood. Ensure the tubing is tight enough to hold the rods firmly. However, make sure it doesn’t crush or damage them. This care will provide extra support when you hang your rods.
Finishing Touches and Customization
Painting and Staining
Once you’ve assembled the basic structure of your fishing rod holder, finishing touches can enhance its appearance. Choose a paint color or wood stain that complements your existing décor. Applying paint provides a protective layer against moisture. Staining, on the other hand, showcases the wood’s natural beauty.
After applying the chosen finish, allow it to dry completely. This drying ensures that the rods will not pick up any unwanted residue. When finished drying, your holder will look attractive while maintaining functionality.
Additional Customization Options
After achieving the basic design, consider adding personal touches. Adding hooks for additional storage can be beneficial. You could attach hooks beneath the holder for fishing tools or bags.
Furthermore, you might also opt for using different colors of tubing. This change adds a unique flair to your visually appealing holder. Additionally, you could even incorporate LED lights to make your fishing gear shine. Such enhancements will create a visually striking display in your garage or shed.
Maintaining Your DIY Ceiling Fishing Rod Holder
Regular Inspection
After creating your fishing rod holder, it is essential to maintain it properly. Regular inspections will ensure that everything remains secure. Check periodically for any loose screws or damaged tubing. Over time, natural wear and tear can compromise function.
Additionally, inspect the wood for any signs of bending or deterioration. If you notice anything unusual, address the issue immediately. It’s better to fix problems when they are small. This proactive approach can prevent larger issues from developing down the road.
Cleaning and Care
In addition to inspections, proper cleaning is crucial for maintenance. Dust can accumulate on both the wood and the tubing over time. Use a soft cloth to wipe down the surfaces regularly. This action will keep your holder looking its best.
If you notice any moisture buildup, address it quickly. Moisture can lead to rot and weaken the integrity of the wood. If necessary, consider applying a protective sealant to the wood. This sealant will guard against moisture damage effectively.
Benefits of a Ceiling Fishing Rod Holder
Efficient Use of Space
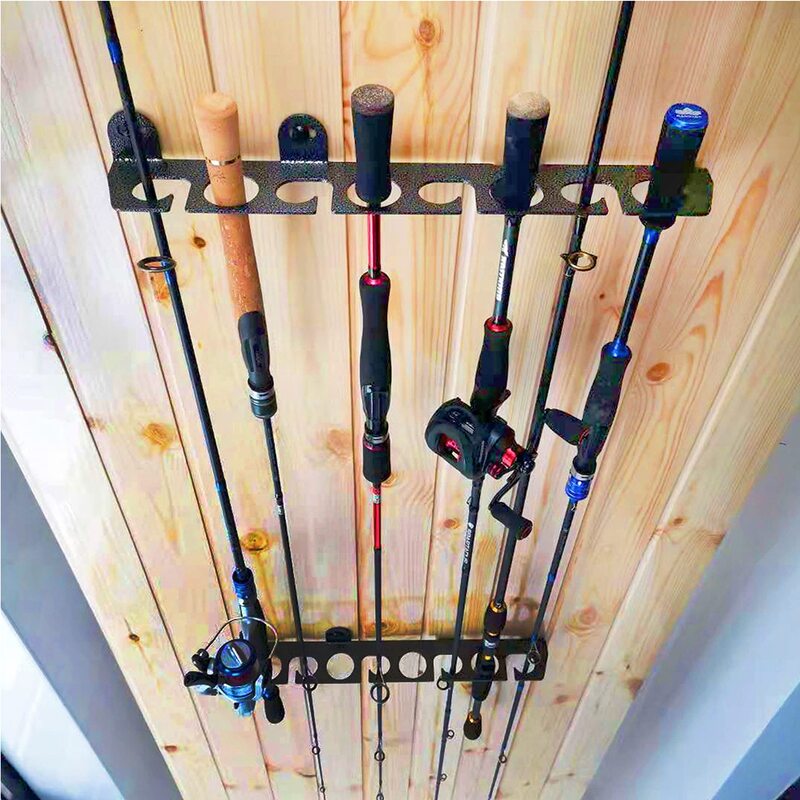
First and foremost, using ceiling space is a smart choice. Many homes have high ceilings that remain underutilized. Consequently, hanging items from the ceiling can free up valuable floor space. This approach is particularly useful for small rooms or garages. Hence, consider how distressed your rod storage currently feels.
Moreover, a ceiling fishing rod holder provides an organized solution. Thus, it can also help you quickly identify which rod you need. When rods are haphazardly stored, you waste time searching for specific equipment. On the other hand, having them neatly suspended overhead streamlines your fishing preparations. Your days on the water will become much more efficient as a result.
Protection Against Damage
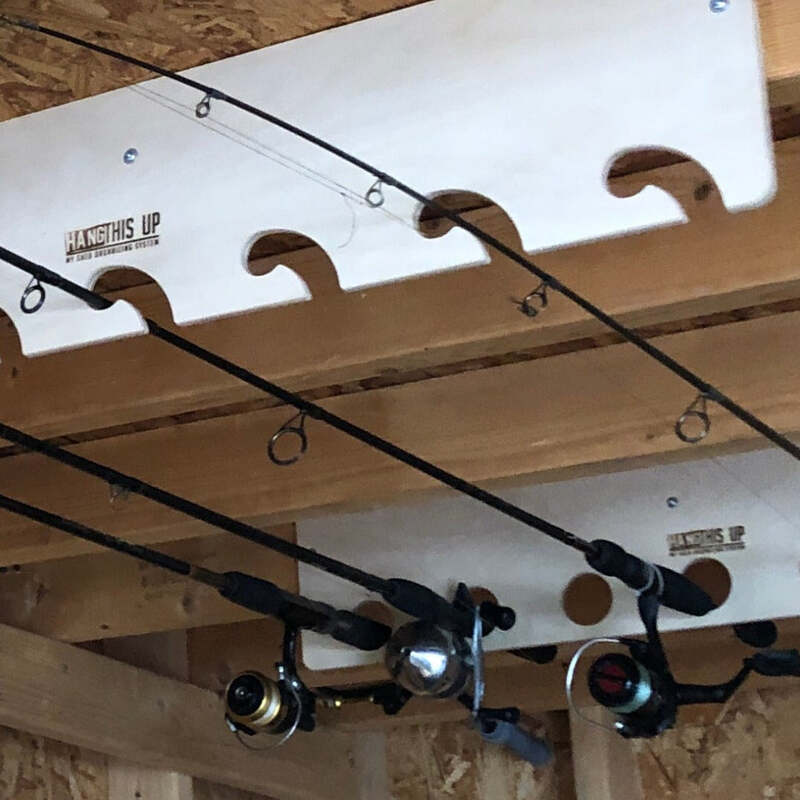
Equally important is protecting your fishing rods from potential damage. When rods are improperly stored, they can bend or break. Over time, this can lead to costly replacements or repairs. A ceiling fishing rod holder not only keeps them organized but also minimizes wear and tear.
Additionally, rods that are laid down flat can accumulate dust or dirt. This can tarnish your equipment and lessen its performance. However, hanging them in a holder keeps them clean and easily accessible. Consequently, when you’re ready to head out fishing, your gear will be clean and ready to go. Simple steps like this can prolong the life of your equipment.
Conclusion: The Benefits of a DIY Fishing Rod Holder
Space-Saving Design
Creating a DIY ceiling fishing rod holder provides numerous advantages. First, it maximizes the available space in your garage or shed. By utilizing vertical space, you keep fishing gear organized and out of the way. This organization prevents clutter and maintain a clean environment.
Moreover, making your own holder can also save you money. Purchasing pre-made fishing rod holders can be expensive. In contrast, building your own is budget-friendly. You can customize it to fit your unique needs and preferences.
Personal Satisfaction
Additionally, there is a rewarding sense of accomplishment in crafting your own fishing rod holder. The effort and creativity involved provide a unique satisfaction. Each time you look at your creation, you’ll experience pride in your handiwork. Home improvement projects often enhance personal skills, too.
Therefore, undertaking this DIY project can lead to additional home improvement ventures in the future. Embracing the DIY spirit allows for continuous learning and creativity. Ultimately, your completed fishing rod holder will serve as a testament to your commitment to organization and creativity.
Enjoying Your Passion
In the end, a well-built fishing rod holder enhances your fishing experience significantly. Keeping your gear organized allows for easier access and less stress. You can spend more time connecting with nature rather than searching for your equipment.
So, gather your materials, roll up your sleeves, and get started on your ceiling fishing rod holder. The result will surely elevate your fishing adventures while keeping your favorite rods safe and accessible. Ultimately, taking the time to create can lead to a more enjoyable and satisfying fishing experience for years to come.