Introduction
For many fishing enthusiasts, a broken fishing rod spells trouble and disappointment.
The Angler’s Plight: Dealing with a Broken Fishing Rod
A snapped or cracked rod can turn an ideal fishing day sour in an instant. Anglers know the dread that comes with realizing their favorite rod is broken. However, not all hope is lost. Even a damaged rod can be mended, allowing fishers to return to the water’s edge.
Importance of Proper Rod Maintenance and Repair
Taking care of your fishing rod is vital. Regular maintenance helps prevent breaks. But when accidents happen, knowing how to repair a rod saves money and preserves the equipment you’ve grown to love. Repairing a broken fishing rod is both a skill and a testament to an angler’s dedication to their sport.
Assessing Rod Damage
Before you pick up your tools, it’s critical to size up the damage on your fishing rod.
Identifying Common Signs of a Broken Fishing Rod
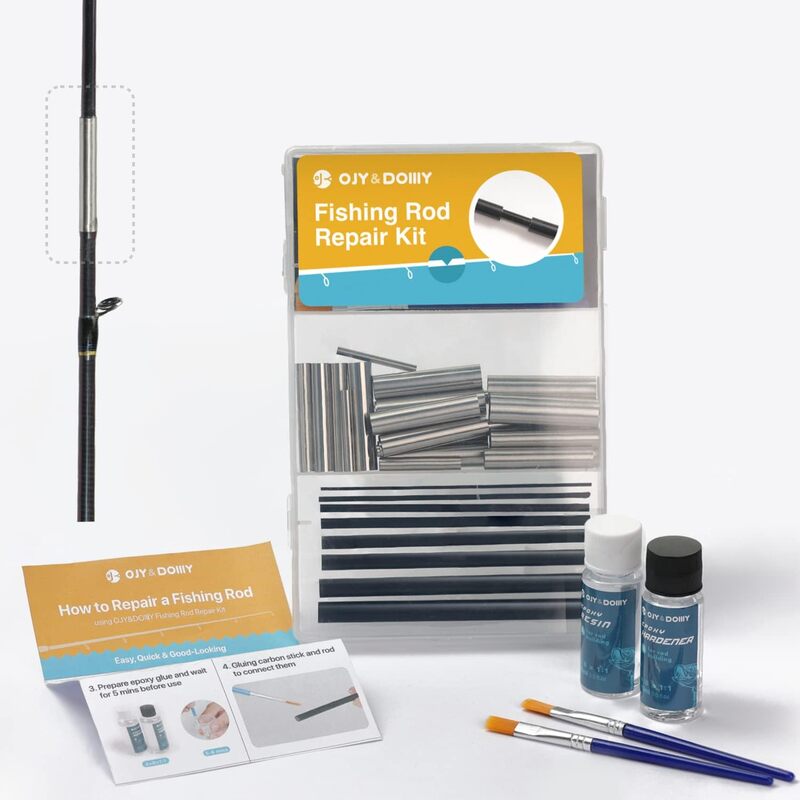
Spotting rod damage early can save you time and trouble. Look for bends or cracks, especially where pieces join. Check guides, also called eyes, for cracks or looseness. Inspect the rod blank for punctures or holes. And, test the tip for weakness or excessive bending.
Evaluating the Extent of the Damage
Not all damage means total failure. Minor issues may need a simple fix, while major problems could mean a more complex repair or even replacement. Assess how deep cracks go and if structures are compromised. With this knowledge, you can choose the best repair path.
When to Seek Professional Help vs. DIY Repair
If the damage is minor and you have some skills, you may opt for a DIY fix. But, when damage is severe or if you’re unsure, it’s wise to consult a pro. Incorrect repairs can lead to bigger problems, so tread carefully and know when to hand it over to an expert.
Choosing the Right Repair Method
Choosing how to fix a broken fishing rod is key to fishing success.
Quick Fixes: Temporary Solutions for Minor Breaks
Small cracks or chips? Sometimes, a fast fix does the job. Tape or a rubber adhesive can help you get back to fishing quickly. However, these are short-term. They may not hold up for long, especially with heavy use.
Replacing Damaged Parts for Long-Term Use
For bigger issues like a snapped section or a missing guide, replace the parts. Many manufacturers offer the exact parts you need. This can sometimes be the best choice to make sure your rod works like new again.
Considering a New Rod: When Repair Is Not Viable
Some breaks are too bad to fix. If the repair is too hard or too costly, it might be time for a new fishing rod. Safety and top performance are most important. Remember, a new rod can offer fresh experiences and new catches.
Preparing for the Repair
Before starting, preparation is key. It ensures smooth repair and prevents mistakes.
Gathering Essential Tools and Materials
Start by collecting what you need for the job. For a broken fishing rod, this includes:
- Epoxy glue made for rod repairs.
- Sandpaper or an abrasive pad for surface prep.
- Clean cloths and rubbing alcohol or acetone for cleaning.
- Gloves and safety glasses for protection.
- Clamps or tape to hold parts in place.
- A sharp utility knife or razor blade for trimming.
Having the right tools and materials makes the repair easier and more effective.
Setting Up a Suitable Repair Workspace
Find a place that’s well-lit and airy. A large table or bench works well. Cover it with an old cloth or newspaper. This will protect the surface from glue spills or scratches.
Safety Precautions and Environmental Preparations
Safety comes first. Always wear gloves and glasses when handling sharp tools or chemicals. Make sure the room is well-ventilated, especially when using strong glues or solvents. Read all labels before use. This avoids accidents and protects your health.
By preparing properly, tackling a broken fishing rod repair becomes less daunting. You’re set up for success.
Repair Steps Explained
Cleaning and Preparing the Damaged Area
First, clean the broken area well. Use rubbing alcohol or acetone and a cloth. This ensures the glue sticks better. Remove loose bits with a knife or blade. Roughen the surface with sandpaper. This helps the glue bond well.
Utilizing Epoxy Glue for Durable Fixes
Next, mix the epoxy glue. Follow the glue maker’s steps closely. Apply it evenly to the broken spot. Epoxy creates a strong hold and lasts long.
Reattaching Guides and Other Components
For guide issues, glue them back on carefully. Line them up straight. Use epoxy for a firm hold. Check all other parts too. Make sure each piece fits well and is secure.
Clamping and Curing Process for Epoxy
If fixing a break, clamp the rod or use tape to keep it tight. This helps as the glue dries. Let the epoxy set as long as the instructions say. Don’t use the rod until it’s fully dry. That way, the repair stays strong.
Post-Repair: Testing and Maintenance
Once you’ve mended your broken fishing rod, it’s crucial to check the repair’s strength.
Ensuring the Repair Is Solid: The Flex Test
Gently bend your rod at the fixed spot. It should flex like the rest of the rod. This means the repair holds. If it feels weak or bends oddly, the repair may need another look.
Regular Maintenance Tips to Avoid Future Breaks
Regularly check your rod for signs of wear or strain. Keep it clean and dry after each use. Store it safely where it won’t get bent or knocked around. Treat it with care when out fishing. This helps avoid new damage.
Knowing When to Retire Your Fixed Rod
No fix lasts forever. If your rod keeps breaking, it might be time to replace it. Look for recurring issues at the same spot. If fixes don’t last, consider investing in a new rod. A fresh start can be worth it.
Choosing a New Fishing Rod
Researching Options
If you have decided to purchase a new fishing rod, research is important. Start by considering your specific fishing style and needs. Different rods cater to various techniques, from spinning to baitcasting. Each type has deep differences in construction design. Furthermore, assess the materials used to ensure they suit your desired fishing conditions. Conduct thorough research to understand the options available on the market.
Testing Rods
When selecting a new rod, it is also essential to test rods in person, if possible. Visit a local tackle shop to get a feel for different rods. Pay attention to the weight, sensitivity, and balance of the rod in your hands. Furthermore, ask knowledgeable staff questions about the rods they recommend. This hands-on experience can clarify which option best suits your needs and comfort level.
Conclusion
Now that we’ve walked through the essential steps to fix a broken fishing rod, let’s recap.
Recap of the Repair Process
To mend your rod, you first assessed the damage to determine how bad it was. You then gathered all the tools and got your workspace ready. With safety gear on, you cleaned and prepped the area. Then, you applied epoxy glue or replaced parts, depending on the break’s severity. You clamped or taped the rod, letting the glue cure. After, you tested the repair for strength and endurance.
Encouragement to Get Back to Fishing
Your rod may be fixed, but your journey keeps on. Take this fresh fix to the waters and test your skill once more. Remember that a repaired rod is a symbol of resilience, just like you. Get out there and cast your line with new vigor, knowing that you have conquered the challenge of a broken fishing rod. Enjoy your fishing adventures and cherish every catch.

